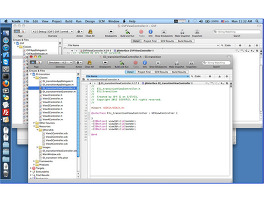
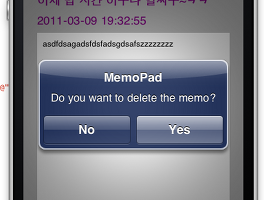
iphone (16) 리스트형 MKMapView에 MKAnnotation 사용하기 1. MapKit.framework 라이브러리를 추가한다. 2. #import #import @interface Annotation : NSObject { double dLatitude; double dLongitude; NSString *sTitle; NSString *sSubtitle; } @property (nonatomic, readonly) CLLocationCoordinate2D coordinate; - (id)initWithLatitude:(double)latitude longitude:(double)longitude title:(NSString*)title subtitle:(NSString*)subtitle; - (NSString *)title; - (NSString *)subtitle; .. iphone-exif 라이브러리 파일 보호되어 있는 글입니다. JPEG 메타데이터 얻기 (iphone-exif 라이브러리 사용) 1. indlude.zip 파일 안에는 EXIF 관련 .m .h 파일이 들어있습니다. include.zip 파일의 압축을 풀어서 프로젝트 안에 추가 시킵니다. 2. AppDelegate.m 내부에 BOOL gLogging = FALSE; 을 적어줘야 합니다. 3. EXIF를 사용할 페이지 위에 #import "EXF.h" 를 선언해 줍니다. 4. 이미지 파일을 불러와서 메타데이터를 추출 후 위도와 경도를 가져옵니다. NSString * path = [[NSBundle mainBundle]pathForResource:@"IMG_0902" ofType:@"JPG"]; NSMutableData *imageData = [NSMutableData dataWithContentsOfFile:path]; EXFJpeg.. 아이폰 GPS 사용하기 ♨ 프레임워크 추가 : CoreLocation.framework #import #import @interface LocationServiceViewController : UIViewController { CLLocationManager *locationManager; IBOutlet UILabel *latitude; IBOutlet UILabel *longitude; IBOutlet UILabel *Heading; } @property (nonatomic, retain) CLLocationManager *locationManager; @property (nonatomic, retain) IBOutlet UILabel *latitude; @property (nonatomic, retain) IBOutlet.. 27. NSThread // 스레드는 한 함수를 관리한다. // 때문에 새로운 스레드가 실행되면서 함수를 실행하고, 함수가 끝나면 자연히 스레드가 종료된다. // 그래서 함수 내부에서 무한 루프를 돌면 스레드가 죽지않고 계속 유지됩니다. // 메인스레드의 이벤트루프가 이런 원리임. 이벤트루프에서 나와서 스레드가 끝난다는 것은 앱의 종료를 의미 // 생성 1 [NSThread detachNewThreadSelector:@selector(_th) toTarget:self withObject:nil]; // 생성 2 NSThread *thTime; thTime = [[NSThread alloc] initWithTarget:self selector:@selector(_th) object:nil]; [thTime start]; - (v.. 26. View Controller 간의 변수 공유 View Controller 간의 변수 공유 하위 뷰에서 상위 뷰의 변수나 메소드를 호출하고 싶을때는 이렇게 사용하는 방법이 있습니다. SecondViewController 에 Instance 변수로 FirstViewController *parent를 선언합니다. 상위 뷰에서 호출할 때 SecondViewController *second = [[SecondViewController alloc] init]; // 하위 뷰 객체 생성 후 second.parent = self; // 하위 뷰와 자신을 포인터 연결 합니다. [self.navigationController pushViewController:second animated:NO]; 이렇게 하면 하위 뷰에서 parent.method... parent.v.. 25. View 전환 효과 View Transition 효과 개인 공부도 되고 다른사람도 알면 좋지 않을까 해서 계속 올릴 예정입니다 소스도 공개해서 파일로 다 올려드리겠습니다~:) 그중 가장 기본적은 뷰 전환 효과! 거의다 뷰 전환시 네이게이션 바를 사용해서 움직입니다. 그러면 뷰의 디자인이 재미없어진다. 무조건 버튼이 위로 가있다. 그리고 테이블을 사용하게 되면 여러가지 효과를 못씁니다 ㅠㅠ. 하지만 버튼을 사용해서 이미지를 입히면 훨신 앱이 유용하고 디자인 폭 또한 넓어집니다. 다른뷰를 가지고 오는것은 대부분 알것이라고 생각해서 뷰 전환 효과까지 넣어봤습니다. 윈도우 베이지로 만들고 뷰컨트롤러를 4개를 추가한다. 그리고 이미지도 따로 넣어봤습니다~ 이왕 할거면 블로그도 홍보 할겸 간단한 이미지도 올려보았다. 그냥 하면 재미없.. 24. UIAlertView 사용하기 ♨ UIAlertView를 사용하기 위해서는 다음과 같이 헤더파일에 델리게이트를 참조시켜야합니다. @interface ContentViewController : UIViewController { } - (IBAction)deleteMemo:(id)sender; 그리고 .m 파일에서 사용하면 됩니다. - (IBAction)deleteMemo:(id)sender { UIAlertView *alertView; alertView = [[UIAlertView alloc] initWithTitle:@"MemoPad" message:nil delegate:self cancelButtonTitle:@"No" otherButtonTitles:@"Yes",nil]; [alertView setMessage:@"Do you .. 이전 1 2 다음